| Applies to:
PcVue all versions. |
||
| Summary:
Sometimes it is necessary to enable SSL (Secure Socket Layer) communication within the IIS configuration for the WebVue Server and Client data transfer. To have a fully secure and encrypted connection you must modify the configuration of WebVue (in PcVue) and the IIS Manager (In Windows). |
||
|
|
||
| Details:
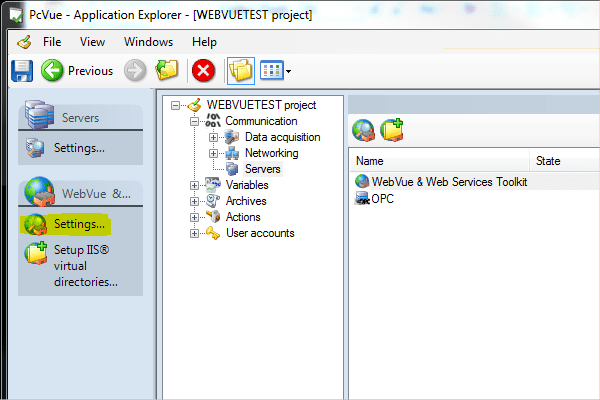
Configuration in PcVue Open the WebVue configuration. Configure.Application Explorer.Communication. Server, WebVue & Web Services Toolkit .Settings.
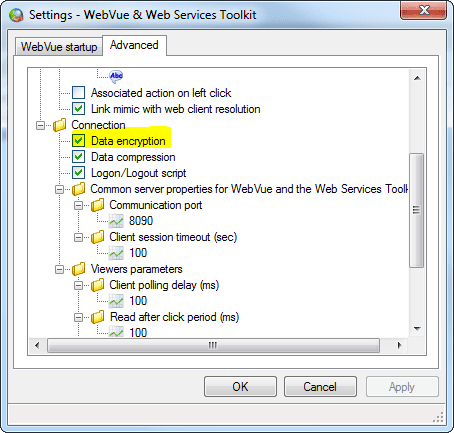
Select the Advanced tab and enable Data Encryption by ticking the corresponding tick box.
To ensure everything is saved, and taken into account correctly, restart PcVue after setting this option. Configuration in Windows The following explanation is for Windows 7. The second part of the configuration is a little more complex and is done within the IIS-Settings. Normally this would be done by the System Administrator but here is a short description of how to do it. Open the IIS Manager. This is found in Control Panel.Administrative tools. Click on the name of your PC within the left pane tree view and then double click in the right pane on Server Certificates. In the newly opened view there are several ways to get a certificate for your Webserver. The easiest way is to select Create Self-Signed Certificate on the right side of the window.
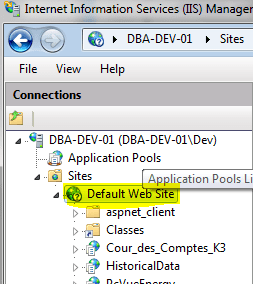
Please note that this is only recommended for testing purposes and normally the System Administrator should provide and setup the certificate within IIS! In the opened window you have to enter a human readable name for the new certificate (e.g. WebVue Certificate). Click OK and close this dialog and then navigate using the left tree view to the Default Web Site entry.
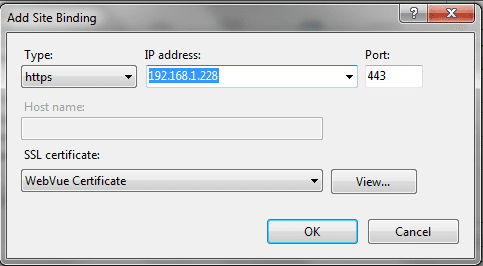
In the toolbar on the right window side you can now find the entry Bindings. Open it and click the Add… button within the new window. Here you have to select the Type as https and select the IP-Address to be used for the server and the certificate.
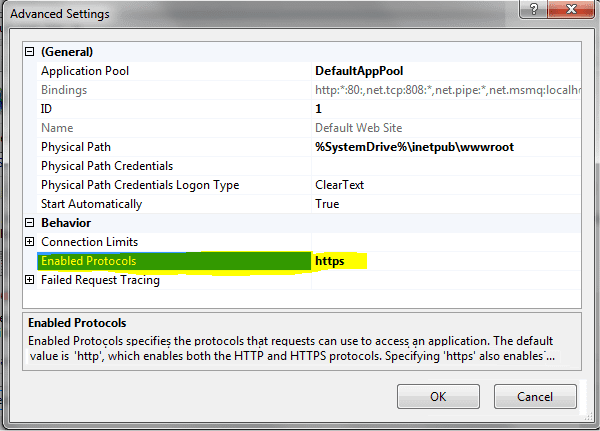
Close all opened dialogs until you get back to the Default Web Site view. Click on Advanced settings… in the right side toolbar and change the Enabled protocols field in the right side to https.
You can close this dialog with OK. Now you should be able to connect to your WebVue not only with http://PROJECT_NAME/ but also with https://PROJECT_NAME. With these settings both mechanisms http and https are enabled. If you want to only allow secure connections you have to return to the Default Web Site view and double click on the SSL Settings menu entry. There you can tick the Require SSL box and click on Apply in the right side bar. Now you can only connect to WebVue with a secure connection.
|
||
|
|
||
|
Created on: 08 Jan 2013 Last update: 13 May 2024
