Back

Topic

[KB568]How to create and export a custom table in the HDS

Tags: HDS, SQL

13 years ago
By RM
Options
Print
Applies to:

PcVue version 9.0 onwards


Summary:

When using a Maintenance Plan & Export Task to export data from a database, the format of the output is defined by the columns of the Trend and Log Tables. Some columns are mandatory, and others are optional, but the order in which they appear is fixed and you cannot add custom columns.

The solution is to add a Log or Trend table to the database using the Application Explorer and then replace the table with an SQL View of the same name. YOU MUST NOT USE THE TABLE/VIEW FOR RECORDING.

An SQL View can be thought of as a virtual table. Its columns do not contain any data – instead they point to columns in another table, or the data can be calculated. A good example of the use of a View is to add a column with a human readable timestamp.

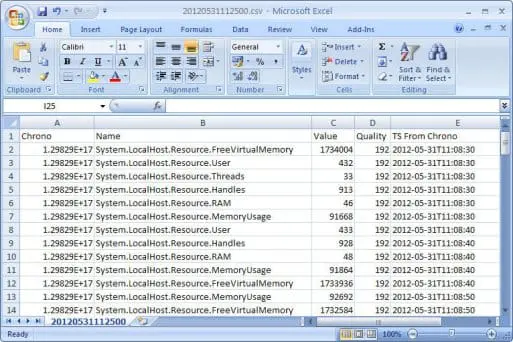
When you use the Export task, the View is treated as if it was a Table and the contents are exported accordingly.

exported_file

The main steps are:

  1. Using the Application Explorer add a table to the database. Restart PcVue. (Tables are only created at startup.)
  2. Install the conversion function as explained in Knowledge Base article KB 492. Optional – only required if you want to create a human readable timestamp column using the contents of the Chron column.
  3. Convert the new table to an SQL View using the SQL Server Management Studio and the attached T-SQL script.
  4. Using the Application Explorer create a Maintenance Plan with an Export Task.

Details:

Step 1 – Add a table to the database

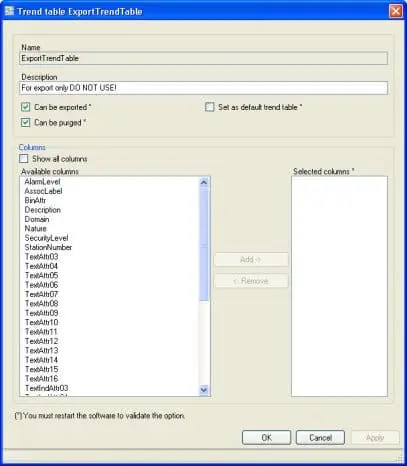
  1. Open the Application Explorer and add a new table (Trend or Log) to an already configured database. In this example we add a Trend Table. It’s a good idea to include a Description that indicates the table is not to be used for recording by PcVue. The configuration of the columns is irrelevant as the table will be replaced by a View.
    trend_table_dialog
  2. Save the configuration, close the Application Explorer and shutdown and restart PcVue.

Step 2 – Install the Time Stamp conversion function

Optional – Install the Time Stamp conversion function. For an explanation see Knowledge Base article KB 492.

Step 3 – Replace the table with a View

  1. Stop Pcvue.
  2. Copy the T-SQL script, SCRIPT.SQL included with this KB article, to a convenient location on your PC.
  3. Start the SQL Server Management Studio (SSMS) and connect to the SQL Server Database Engine using the command File.Connect Object Explorer.
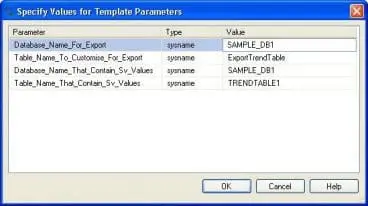
  4. Open the script using the command File.Open.File . For convenience the script has been written using a template. Open the template using the command Query.Specify Values for Template Parameters and enter the names for your database and tables.
    template_parameters
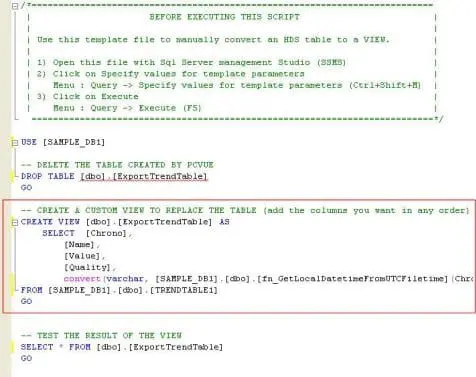
  5. If you want to customize the columns you must now edit the script. The script as supplied has the columns Chrono, Name, Value & Quality plus a calculated column with a human readable time and date stamp.
    annotated_script
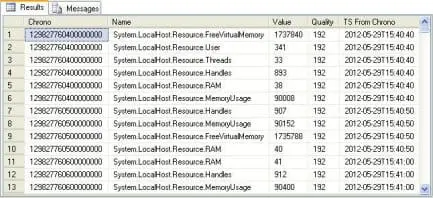
  6. Run the script using the command Query.Execute or function key F5. Check for any error messages and make any necessary corrections. If the script has run correctly it produces a test output in the Results pane.
    results
  7. Close SSMS.

Step 4 – Create a Maintenance Plan with an Export task.

  1. Restart PcVue and open the Application Explorer.
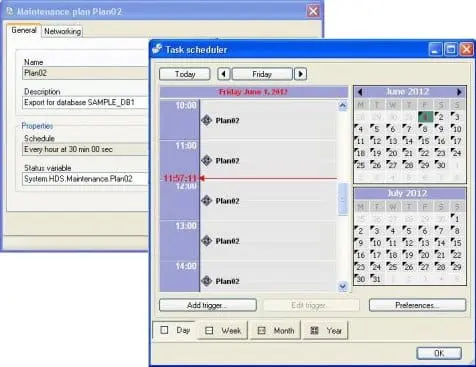
  2. Create a Maintenance Plan and change the schedule as required. Save the maintenance plan.
    maintenance_plan
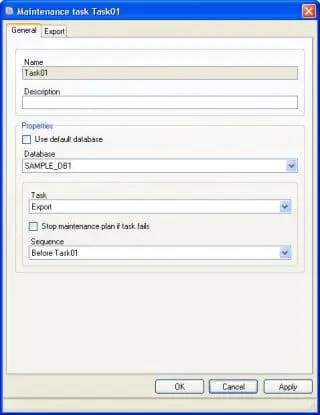
  3. Attach an Export Task to the Maintenance Plan. Configure the Export Task as required and save it.
    export_task
  4. Close the Application Explorer. The configuration is complete!

Note: To avoid exporting any other tables of the database just de-select the option Can be exported for those tables.

 Download attachments: script.sql.txt


Created on: 15 Jun 2012 Last update: 13 May 2024